

Canning Bear Meat
It is simple to strike fear into the hearts of dinner guests. Just ask if they want some bear meat. When the horror melts from their face, they will strive to refuse in the nicest way possible. Everyone knows bear meat isn’t fit to eat. “My uncle told me you had to chew it for three days.” “I heard it is greasy and only good for sausage and jerky.” “My buddy fed me some of the worst-tasting bear meat back during Nam.” The truth is, like any meat, it can be quite good!
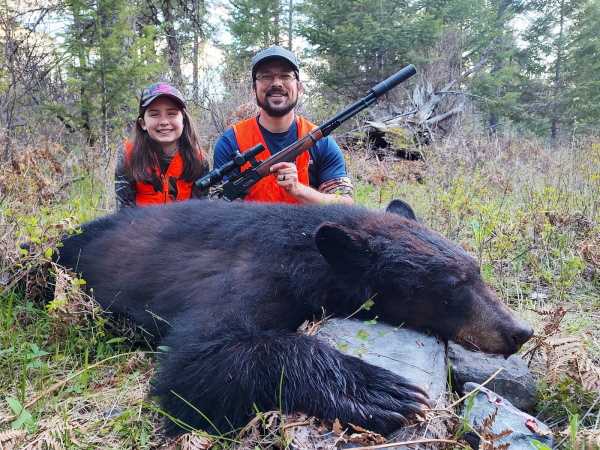
I recently harvested an average, 5-foot, spring black bear. I wish this was a hunting story of toil and hardship where I pursued the bruin for days and finally got a shot at him on the last day of the season. The truth is, I never pass up an opportunity to shoot a black bear to fill my license in an effort to help the ungulate population. Bears eat a lot of deer fawns and calf elk every Spring. As low as our deer numbers are in Western Montana now, I try to do my part in predator hunting. What do you do with bear meat?
During the last big-game season, I began pressure-canning meat. I decided this bear would be a good test subject since the muley and elk meat turned out so well. Canned bear meat is better than muley for sure. I would call it a close second to the canned elk meat which I eat straight out of the jar. The reason I started pursuing the canning of wild game was to preserve meat without needing freezer space. We are blessed every year with a freezer of wild game, but what happens when your freezer stops working while you are away for a few days? It would be tragic to lose all that hard-earned meat.
Before I owned a pressure canner, I hot water canned some carrots and leftover stew. A couple of weeks later, I went down to grab a can of something and noticed that pressure had built in the jar of a couple of them. The lids were bent outward. I threw them out. Hence my study and procurement of the pressure canner.
I researched how to can meat before buying the cheapest pressure canner I found. It was less than 80$. The reason you need a pressure canner is that certain vegetables and meats can cause you to get botulism if the bacteria are not killed with sufficient heat over sufficient time. Most canning companies heat their product to 250 degrees for 3 minutes. My understanding of a pressure canner is that it gets the contents to 240 degrees, and I keep it there for 1 ½ hours (90min). This kills the Clostridium Botulinum bacterium that produces a toxin when in a low-oxygen environment (like a jar). When canning items with high acidity (some fruits and vegetables), there is a less likely chance of getting botulism. Low-acid foods have a PH value over 4.6 and include meats of all kinds, milk, and most fresh vegetables. Please do not let this scare you, it is easy to pressure can your food safely. Here is how.
What do you need to know about canning meat?
Packing the jars –
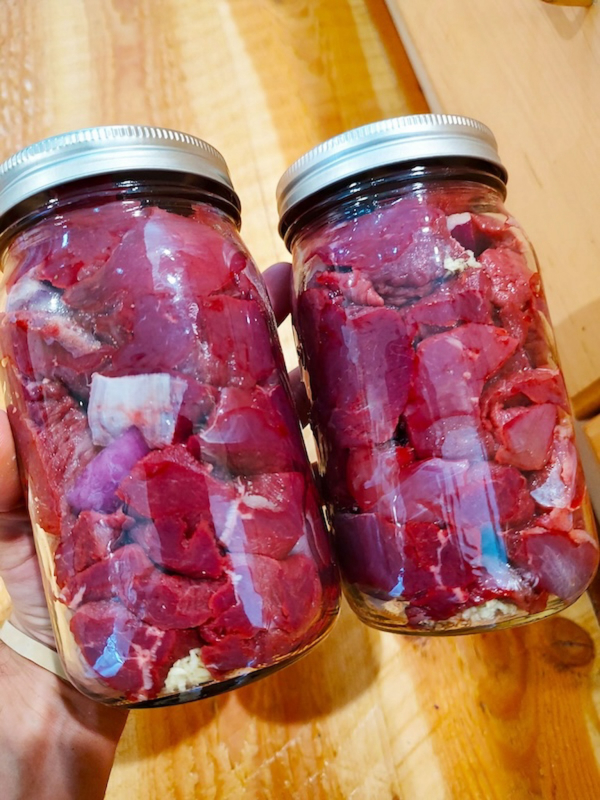
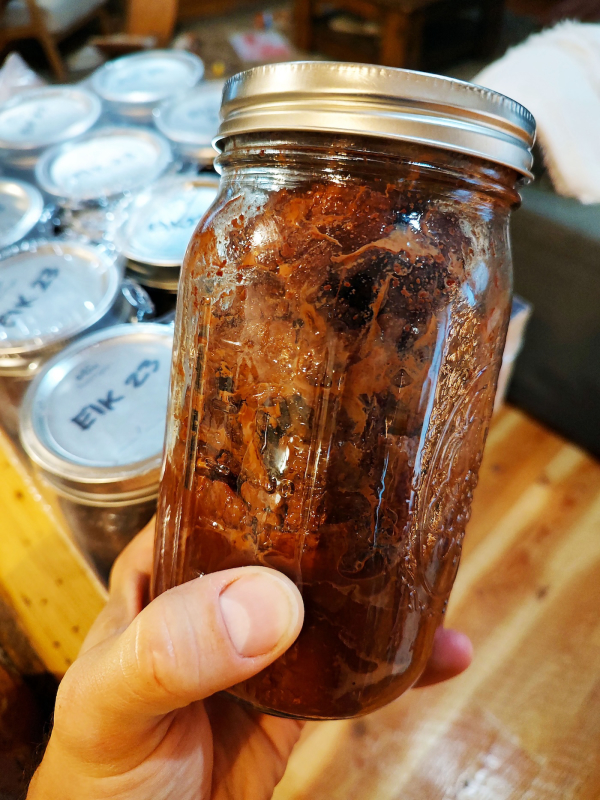
Cutting up our wild game, I pack it into the jar raw. I don’t add any liquids as pressure canning brings quite a bit of moisture out of the meat and reduces the volume of meat in the jar, so I pack it tight to the top before putting the lid on. If it is a deer, I remove all the deer tallow I can before packaging or canning. Elk and bear fat are different and not as crucial to remove. I am more lax in the elk fat I leave on the meat. If it is clean, I don’t bother removing the bear fat from the meat. All the fat in the jar will be congealed, at the top of the liquid line, in the jar upon cooling. This is great for stews and can be a desired flavor. Tendons and connective tissues are also less critical to remove before pressure canning. They turn into a gel similar to the fat and aren’t bad at all. In fact, it is probably good for your joints!
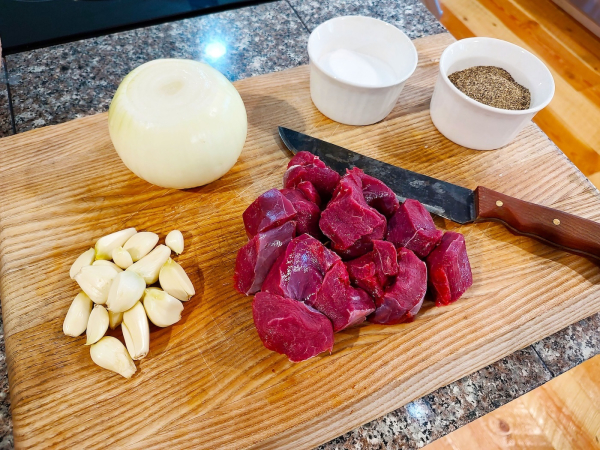
The great thing about this process is that you are basically making a roast out of whatever you are canning and can add flavoring ingredients that will permeate the meat. My go-to additions are salt, pepper, onion, and garlic. A teaspoon of salt in a pint jar, and two in a quart jar. I slice onions and peel fresh garlic or save some trouble and get canned garlic in oil. I put these in the bottom of the jar with a little pepper before stuffing it with meat. My uncle, Rick, likes to use a dollop of beef bouillon.
The Seal –
You want the seal and the top of the jar to be clean, but meat juice is going to bubble out of the jar when in the canner, so just make sure there are no chunks of anything in the sealing area and screw the lid down to where it lightly touches. As the pressure builds in the canner, bubbles, and some moisture will need to escape, so don’t tighten the lid too much.
The Canner –
If you have a glass stove top, make sure you get a pressure canner that is safe to use on the glass top. It should say it on the box, but I don’t think mine does. The online canning consensus is to use a flat-bottomed canner if you have a glass stovetop. Do your research there when purchasing your canner. Elements and gas burners should be fine, and many canning experts use a gas burner outdoors. My canner came with a cooking pamphlet that goes over procedures, safety, and recipes.
I have experimented with the level of water I put in the canner around the jars. The water level does not seem to matter as to the level or height of liquid in the jar with the final product. It does seem to take more time and heat if you get too much water, so I usually put the jars in the canner and then bring the water level up to 3-4 inches. This canner says to heat the water until it boils and then you put the lid on. I can fit seven-quart jars in ours.
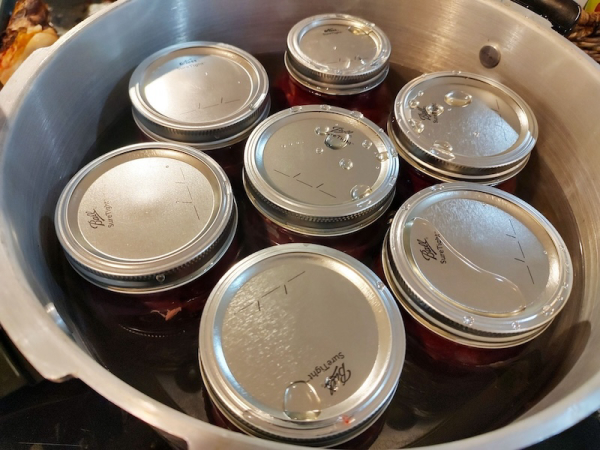
I like to wipe a little cooking oil on the rubber seal in the lid, top, and bottom, so it slides smoothly on the main pot. Then you wait until the pressure builds enough to seal the pressure relief plug and the locking plug. The locking plug pushes out and blocks the lid from being opened. This is a great lid attribute, so the user is less likely to steam their face off by prematurely opening the lid. When the steam begins to shoot out of the center port in the lid, you put the weight on top. This allows the pressure to be maintained where you need it while allowing excess buildup to escape. I can then turn my burner down from 10 to the 4 setting and it will maintain the pressure. The cooker I have uses different weight settings that you remove or add depending on what you are pressure-canning. It will sit there and rattle for the next 90 minutes until the batch is done cooking. For meat, they recommend the 15psi weight. I’m sure higher-grade pressure canners have a better system, but this is economical and works quite well. Sometimes simple is better!
When the 90 minutes is up, turn the stove off, you can move the pot to a cool spot or leave it on the cooling burner. Pull the top weight off while avoiding the hot steam geyser that comes out. ALWAYS tip the weight (and the lid later) up away from your face when you do these steps. The steam will whistle until the pressure subsides. When the lid’s blocking plug drops, the pressure is acceptable to open the lid. Have a place to set the hot lid and take it off. Again, lift the far side of the lid away from your face so the steam cloud is as far from your face as possible!
I use a pair of metal tongs to grip the lid of each jar and pull them out of the canner. It would be best to buy a pair of canning tongs that are perfectly fit to a jar lid. The jar will still be boiling inside. You want to do this soon after the pressure is out of the cooker so it seals as hot as possible. Using two towels, I hold the jar with one and tighten the lid with the other. This is a hot process, please use caution! If you over-tighten the lid while it is hot, you and your spouse will likely not be able to open the can later with your bare hands. Just tight is good enough. Set the jars in a place where they can cool and let them do so. You will hear each lid pop as the hot air inside the jar shrinks. This means they are sealed. As long as the lids are suctioned down, you know the contents are secure.
When your canner is cool, wash it as soon as you can. The contents of the jar will be all through the water in the bottom of the canner and will cause it to smell if not cleaned properly. Take the seal out of the lid and wash everything. Even after washing, do not put the lid on it so there is constant airflow. If you don’t, it will turn quite sour inside. Ask me how I know. I wasn’t home when this happened to ours and it wasn’t put in the box either. If you clean it properly, allow it to dry, and put it back in the box how it fits with the lid off, it will be fine.
The Jars of Meat –
When the jars of meat are completely cooled, I wash each one with soap and hot water. The film of meat water from inside the canner needs to be washed off. Then you can label the top with what it is and the year you canned it. Then all mine go on a shelf in the basement. Just think of all that freezer space you just saved! I was told you should always eat it within two years. I’ve also heard it will be fine longer. You can use your judgment on that.
Our favorite recipes –
My favorite way to eat canned wild meat is to pop the lid and pick it out with my fingers. For the family, I can it in quart jars. I like it in pint jars for eating while driving to and from hunting. With the onion, salt, pepper, and garlic, it is perfectly seasoned. You can adjust your seasoning recipe to your liking.
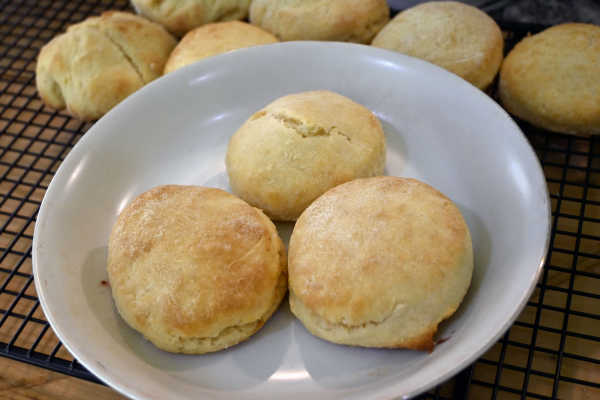
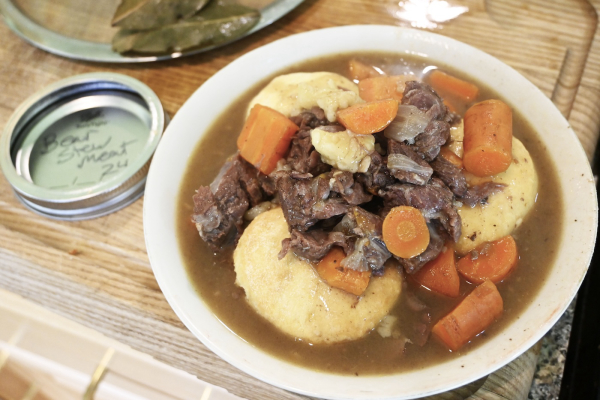
Canned meat makes an excellent stew or soup meat. It is tender and precooked. Be careful you don’t add it too soon or it will be overly soft. Let your veggies cook halfway before adding the meat. I scraped the bowl we made bear lard biscuits in and dropped the scrapings in the stew. This gave us some little dumplings. Delicious.
The easiest way to use canned meat is to drain the liquid (which I like to drink like au jus) and shred it with a couple of forks. Then stir in some BBQ sauce and throw it in the oven. Don’t literally throw it, you might make a mess. When it has heated up, slap that on a bun or piece of bread and you have semi-instant pulled bear sandwiches. Use your creativity to cater to your taste buds! The BBQ sandwich option is great for those stinky rutting muley bucks who don’t always taste great.
Reuse your Jars –
Scrub the jar out and wash it as well as you can. Wash the lids but be careful not to damage the rubber ring that that seals the jar. Do not put the lids back on during storage. Leave them open during storage. Rinse the jars and lids before your next round of canning.
Make this article’s URL a favorite on your browser and refer when you are ready to start canning your wild meat. The key to good-tasting wild meat is to keep it clean and cool until preserving it. You will hand the jar to your buddy, who will turn their nose up at it. With a little coaxing, they will eat the whole jar. Enjoy!
You may also like
-
A New Family Favorite: Smoked Wild Turkey Breast Recipe
-
Be Bear Aware: Take Steps Now To Avoid Potential Conflicts with Black Bears This Spring
-
Teriyaki Wild Turkey and Bacon Kebabs
-
Fried Backstrap with Bourbon Gravy from Timber 2 Table in Realtree Newsletter
-
Wild Turkey Parmesan Recipe by Timber 2 Table in Realtree Newsletter